Showing posts with label School. Show all posts

Monday, May 23, 2011

Finally

I got an A. And it is only took me a few weeks after the semester to post my final project.
As a kid I loved the "what in the world" section of National Geographic Kids magazine. They took regular household items or objects most people would recognize and photographed little details in a super close-up, macro setting. I wanted to recreate the game. So here it is my final project and your "What in the world" game. (Most aren't difficult, but there are a couple that hang people up.)


Answers:
ɥsnɹq dn-ǝʞɐɯ ˙0⇂ ɥsnɹqɥʇooʇ ˙6 ɹǝʇɐɹƃ ǝsǝǝɥɔ ˙8 sʍollɐɯɥsɹɐɯ ˙ㄥ ɐuɐuɐq ˙9 sƃuıɹʇs ɹɐʇınƃ ˙ގ sʎǝʞ ɹǝʇndɯoɔ ˙ㄣ sdıʇ-b ˙ᄐ ɥsnɹq ɹıɐɥ ˙ᄅ ʎɹɹǝqʍɐɹʇs ˙⇂

Thursday, May 19, 2011

Let's play in the dark...room

By far my favorite part of my photography class was the darkroom. It was a little nerve racking at the end of the semester not knowing if the darkroom would be completed in time, but we were lucky enough to get 2 weeks to play in the darkroom. And I was going to take full advantage of it.
First we did photograms. These are...well let's just quote Wikipedia
"photogram is a photographic image made without a camera by placing objects directly onto the surface of a photo-sensitive material such as photographic paper and then exposing it to light. The result is a negative shadow image varying in tone, depending on the transparency of the objects used. Areas of the paper that have received no light appear white; those exposed through transparent or semi-transparent objects appear grey.[1] "
I really loved my first photogram (one on the left).
After that I developed a few photos.
I really like the image on the right. I used some of the negative on the right to help frame the image.
You are seeing everything of the image, no cropping.

Sunday, May 1, 2011

Ssh, I'm hunting photos

Because my teacher doesn't think we have enough to do, she threw in a useless assignment to keep us busy until our darkroom opened up. We had to shoot at one location, using film and capture images from a scavenger hunt list.

The List

  1. Architecture 
  2. Eyes
  3. Leaves
  4. Movement
  5. Night shot
  6. Reflection
  7. Small creatures
  8. Something amusing
  9. Something red
  10. Windows
Here is what I got (in order)

Note: The images are grainy because the studio who processed the film scanned the images onto a CD at really low resolutions. Don't fight me on this one, this is just what our teacher told us to do.


Hard to see, but there is the blur of car headlights


Can you see me?

This one was a stretch, but there are "small" birds on the top of the building

I thought it was funny


Friday, April 29, 2011

Photo the familiar #8

This assignment had a weird title. "The familiar." What does that even mean? Basically we could take photos of whatever we wanted. I just happened to be going to Island Park in Idaho for the weekend and took my camera.


My second photo for this assignment came as I was wondering the avenues looking for a park with swings (I love to swing). I came across a city worker  flooding the road. This is what I got.

Thursday, April 14, 2011

Photo 6ish/7ish

So I may have shot for assignment 6 and 7 on the same day and just picked my favorites for each project. Assignment 6 was more to display the burning and dodging photoshop skills we had learned in our class. And 7... actually I don't know if 7 had a point either. Oh wait, it was dealing with white balance, so we basically just got to play around with our cameras and photoshop.

Ain't he cute
Burned in the sky

Burned in the window, dodged the walls
My new friend Pahoo

Just cause it is a cool truck

Adjusted the coloring to give it a old rusted feel

Wednesday, April 13, 2011

Photo #5 Lighting

Now this assignment was a funny one. And I say that sarcastically since I was completely frustrated. Yes I know what lighting is, but no my teacher doesn't know how to teach. My teacher spent an entire lecture discussing high and low contrast images then proceeded to show examples and asked to identify high and low KEY. The assignment was then to shoot high and low key images. I was so confused assuming that high contrast and high key were synonymous and therefore not preforming very well. High contrast and high key are not the same. Thanks to the trusty book I finally get it. No thanks to our so called "teacher." Here are my not high key or low key images.

High Contrast

Low Contrast
I love that it looks like these 2 chairs are having a conversation.

Friday, March 18, 2011

Photo #4 Moves

I had a lot of fun with my fourth assignment, motion. We had to stop action (photo 4) and make an object look like it was in motion. Motion creates some great energy in an image. By using a technique called panning, where you follow the object in motion, you can blur the background while the thing in motion looks crisp (see photo 5). You can also slow the shutter speed and capture the movement of an object while the background stays in sharp focus (photo 1-3). Here is some of my favorites.

My favorite moving object in SLC
(here is a secret... they were hardly moving that night)

I got this by accident which means I really don't know how to repeat it

I'll be honest...I shot this same photo along time ago for my first photo class
so I knew it would turn out how I wanted it.

Erika was so sweet to let me ask her to do this again and again and again

We loving call him Hoopes

Monday, March 14, 2011

Photo Assignment 3

Back to catch up. My third photo assignment was to play with depth of field. I used my Minolta film SLR to take these pictures. I was running out of time to get them done and developed before my next lab day so I ran over to Liberty Park on my lunch. These are my favorites.

This image was to show a large DOF (everything in focus)
This photo has a shallow DOF so only the
first trash can is in focus.
The think DOF is my favorite way to create interest in an image. I am not always good at getting the camera to do what I imagine, but that is why I am taking the class.

Monday, February 28, 2011

Photo Assignment 2

Our second assignment we learned to scan negatives and to use the heal and brightness & contrast photoshop tool. This was a photo I took in my U of U photo class. I removed all the dust on the negative and burned in the sky. The adjustments are professional, but I liked the final product.

Saturday, February 26, 2011

Photography Class - Assignment 1

After a crazy school and work schedule last semester that left me stretched thin I decided to only enroll in one class. I registered for the photo 1 class. I took a photography class when I was at the U of U, but it has been a really long time since I used my film SLR or was in a darkroom so I was excited to take the class (Note: we won't be in the darkroom until after spring break, the first half we can use digital and if we shoot film we scan in our negatives.)
Our first assignment was to just take a roll of 36 exp film and get them developed. After getting our gear list I headed to Pictureline and asked them to get me the film I needed (my teacher has described it as chromogenic film which I think confused the store clerk). I walked out of the store and started shooting. We only had 2 days to shoot and get the film developed.
It was the night before class and I raced to Inkley's to have them develop my film only to discover I had purchased the wrong film. I had true negative film which is what is used in the darkroom. Inkely's would have to send the film to a lab and it would be 2 weeks before I would get it back. WHAT! It was due the next day. I had a small freak out then headed home to redo the assignment. Luckily, I had my friend Matt's Nikon D90 camera which he had loaned me to take photos of him proposing to his finance (YEAH Matt is engaged). So in only 45 minutes I took 36 photos of whatever I could find in my house, downloaded them to Walgreen's and was really annoyed at how boring my photos were.
The next day I picked up my prints and went to class. For critique we got in a groups of 4 people. We passed our prints to the right and the person next to us picked out their favorite 15 images from our rolls. Then those 15 images were passed again. The next person picked their favorite 10 of the 15. Again the prints were passed and cut down to the person's favorite 5 of the 10.
I actually really enjoyed this type of critique. Once complete we presented our best 5 to the class for open critique where people explained why they picked certain images. But what I didn't like were the images my group selected as my best images. I was really surprised by a terrible guitar photo they selected. There was nothing unique about the image nor was it shot well. So to appease my abhorrence at the selection I am presenting my favorites from this assignment.
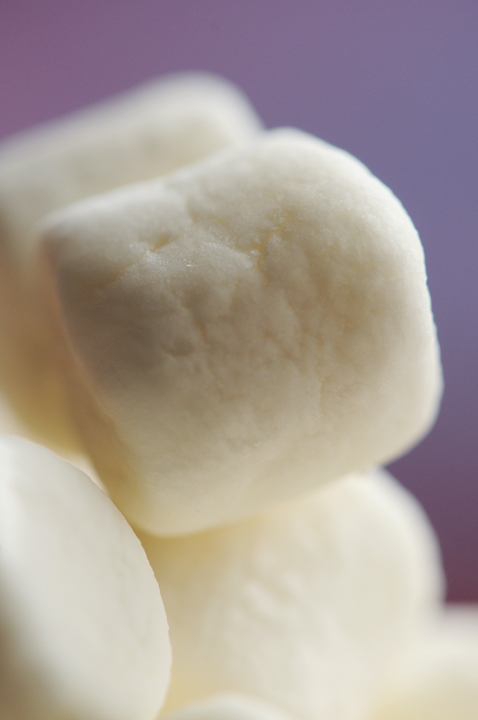
My fellow classmates selected these as my best photos
 (my feet? you can tell I was  hurrying)

These are my favorites.
Now I wouldn't say that there wasn't some good thing about what they selected, but I found these second group of images more interesting. I like the blinds in the second group better because you could piece together some lights of the city. I loved the depth of field on the pears and I liked the angles of the lights.
What this critique demonstrated to me was the everyone has very different style and taste. But one of the things I really want to learn while in school is solid design principles so I can back up my opinions and be able to communicate powerful critiques based on design, not personal taste.
I am open to critique so leave a comment with your feedback.

Thursday, December 23, 2010

I'm finished...for now

YEAH!  I finished my first semester.  It was a little stressful to have classes every night, but I learned a lot.
Here is my final projects for my Design class.  The final was self portrait.  Pretty open again, but I enjoyed my results.

Tuesday, December 7, 2010

Project #7 - Scrap Sculpture

Hello, really open project.  Some people would love projects like this, but they stress me out.  The project was to create a sculpture.  We could use any material, basically scarp.  I could use trash, metal, fabric, food, feathers, rocks, trees, sticks, spike (Land Before Time reference).  As you can see I wasn't limited.  This just makes things become difficult for me because my mind runs 500 miles an hour and I can't seem to focus it.
So after struggling for a while I came up with an idea...a tree and a pretty little birdie in it, but with some unusual tree colors and a bit larger than normal bird. I think it kind of turned out like a Dr. Seuss tree and I like it.

The Result

Wednesday, December 1, 2010

Art Project #6 - Related Arcs

I can't draw.  I think I may have mentioned this before - Here and sort of here (the reason for the tears).   So when my professor presented our sixth design project I instantly panicked.  Related arcs.  This project was basically drawing.  I thought this was a design class not a drawing class. 
sorry for the poor photo quality, I snapped this with my phone

We had to draw 30 thumbnails - 10 animals, 10 birds and 10 human figures.  HUMANS!  What! Aren't those like the hardest thing to draw. I won't say there were tears, but almost tears. It was the big welling up of the eyes, but no actual release of a tear (quite proud of myself for sort of holding it together). 
I had a terrible time working on this project. I spent extra time talking to the professor asking him more questions on related arcs (his first instruction was pretty vague).  I started to get it a little more with each object I would draw, but still lacking translating my brainwaves thru my hand onto paper.  Here is how things work for me.  I am not a masterful drawer.  I can't just seat down and draw something that people will recognize.  So I usually look up pictures on the WWW of what I want to draw (in their simplest format) and basically copy them.  This is how I proceeded with this project as well.  And I saved the worst for last, human figures. I was lucky to find some drawings online that I could reference and surprise I was able to make some half decent looking human figures.  Decent in the sense that they are not planes that look like whales.  I was so surprised and slightly proud of myself that even though it might not be my best drawing, I turned in my human figure drawing.

Friday, November 5, 2010

Art Project #5: Collage in Motion

My latest design is a collage in motion. My concept was text, action words, in motion.  I learned that I have a very narrow view of what a collage is and how to use it.  I really had to LEAP out of my comfort zone and relay on wiser designers (Ashley).  I also experienced the disappointment of waiting too late to start a project. I was 2/3 into it with very little time left when I opened it up for critique.  The critique was spot on and provided me with really good feedback and help to visual the strengths and weaknesses with the design.  Unfortunately, I was too far into it with too little time to make some of the recommended changes, but the critique helped me finish with something I am at least happy with. 


I was so nervous for my class to see it.  I liked it, but was afraid that it wasn't "collage" enough.  Most people in my class did a traditional collage with some slight variations to how things were laid out.  I think they liked my design, but it was a mixed response whether it was a collage or an illustration.  I guess it is good to stretch my perceptions of design a little and risk that they don't like it or disagree with it.  I learned a lot and have new ideas for how I would do it next time to make it more collage without looking collage.
A huge THANK YOU goes to Dan in my InDesign class who helped me figure out how to distort the text streams.  Jeff (also in InDesign) and Talena for helping me come up with ideas for my project.  And BIGGEST thanks to Ashley who is a design genius.  She is really great at communicating design.  I learn something more about design every time she critiques my work.  She is much better than some of my professors.

P.S. Still working on the patience in art thing.

Friday, October 22, 2010

Art Project #4: Mask

For a little fun Halloween treat our 4th design project was to create a mask.  There weren't many guidelines besides the mask had to cover the entire front of the face.  This was actually my second mask.  The first one looked really horrible so I was glad this one was cool. 

Mask Theme: Hard vs Soft.  
Although I didn't do some of the things I had originally planned to make this theme really stand out, I think it still works.

Materials used:
  • Orange Flannel
  • Green Yarn
  • Tin Foil
  • White/Orange Sheathed Wire
  • Mask base
  • Glue (spray glue and craft glue)
Wearing the mask before heading to class

Monday, October 11, 2010

Art Project #3

I finally got to use color in a project.  I must not get too excited because this is one of the only projects I can do that in so I don't want it to go to my head.

Project Details:
Choose from industrial object, animal or plant and create a segmented drawing.  Continuously enlarge the object until it is no longer recognizable and is just shapes.  Only on the final design can color be used (black & white are not considered colors in our class for design purposes).

My Design:
I decided to use a desk lamp for my design because I suck at drawing animals and plants (except maybe a daisy or a bird that looks like an 'm').  The project was fun.  I got to use this old fashion, but really fun, projector at school to enlarge my design.
For my final design I use dark navy as the background color and varying shades of blue to highlight my focal point - yellow. 
I am fairly happy with how it turned out, but figuring out the colors were a nightmare.  We couldn't use a computer so I had to just experiment with materials I could find.  I decided to use color paper to achieve my color.  I headed to the craft store and thought I had found the perfect color mix.  My original plan was to create a gradient, but the color jump between 2 blues was too drastic and just didn't feel right.  Ultimately, I went with the colors below.

Monday, September 27, 2010

Art #2 Patterns

My second design project (turning in tonight) was to take 2 items that naturally go together like sun & moon or bat & ball, etc and create a pattern using them. 

The rules:
  • Simple shapes
  • Recognizable form
  • Solid black shapes
  • Shapes must touch or overlap
  • Pattern built from shapes must touch or overlap
The process:
  1. Create a list of 20 items that go together
  2. Sketch (thumbnails) a few of my favorite ideas
  3. Take 1 or 2 ideas and start putting the items together and dabble with patterns
  4. Final design - A 10" x 15" sheet filled with a pattern
  5. Mount on mat board and present to class for critique
My design: (My thumbnails won't be shown here because really they are horrible.)
I came up with two designs I really loved, but in the end I am only turning in the second.

Tent & Fire


Treble & Bass Clef